

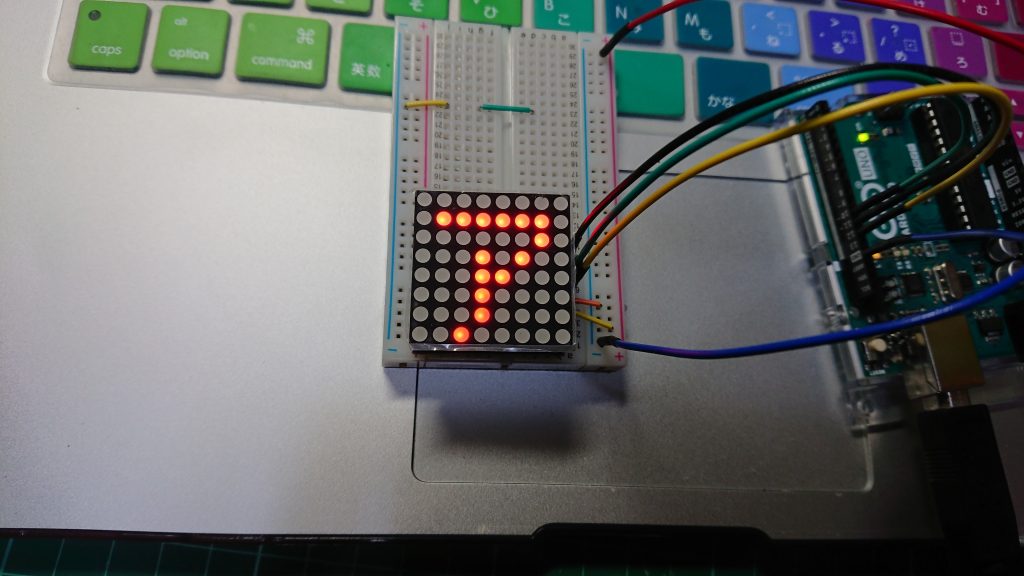
マトリクスLEDを使って8×8のドットで文字を表示させる
※2021/5/2 追記
使ったもの
Arduino UNO R3
8×8 赤色マトリクスモジュール
(上記の商品以外でも、MAX7219のICが入っているモジュールなら対応できるハズです)
適当な長さのジャンパワイヤやブレッドボード
ライブラリ: LedControl GitHub
※元のリンクが消えてしまったため、ライブラリの作成者とは異なる人のGitHubを参照しています。
ドットフォントの参考に 「美咲フォント」
※このモジュールに入っているIC MAX7219を使ってマトリクスLEDを光らせる方法は調べると沢山出てくるのですが、
個人的に使いやすいかも?というのをピックアップしています。
ArduinoIDEに「LedControl」ライブラリを追加します。LedControlのスケッチ例「LED_matrix_kit_test」をイジっていきます;;
※上記のサンプルスケッチが存在しないため、本ページ下部のコードを参考にコード解説をご覧ください。
サンプルスケッチにはかなり分かりやすくコメントアウトされています
あんまり英語が分からない人でも伝わる程度に^^;;
とりあえず、重要そうなコードの解説をっ、、
コード解説
LedControl Object_name = LedControl(DIN, CLK, NUM_LEDs);
これでオブジェクトを作成します。引数にそれぞれのピン番号と使用するマトリクスLED(IC)の数を渡します。
サンプルスケッチではオブジェクト名は「lc0」となっています。
マトリクスLEDは最大で8個まで対応しているらしいです(未検証)
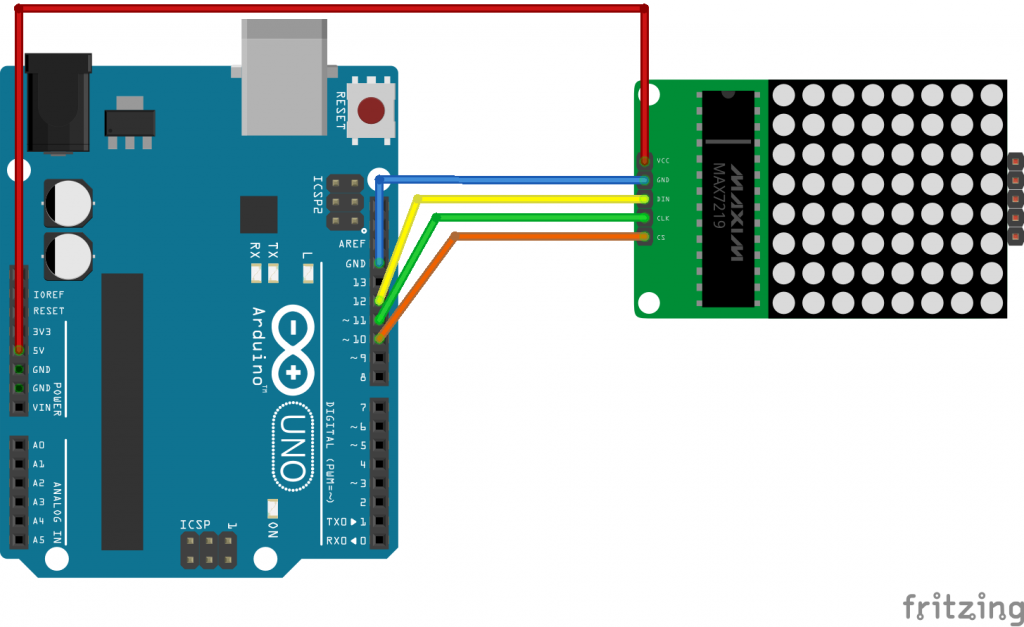
上記の3つのピン以外にArduinoの5VとGNDをモジュール(VCC, GND)につなげる。
void setup(){
int deviceA=lc0.getDeviceCount();
  for(int addressA=0; addressA < deviceA; addressA++)
  {
    ~~
    lc0.setIntensity(addressA, 5);
    ~~
  }
~~
}
セットアップ関数の中にマトリクスLEDの明るさを指定できる関数が入っています。
複数のマトリクスLEDを想定しているため、for文で書かれているので
8個までのマトリクスLEDそれぞれで明るさの調節ができるようです
明るさは0~15まで (消費電力に気を付けましょう)
void loop(){
  lc0.setRow(Num_Matricies, row, bits);
}
Num_Matriciesで表示させたいマトリクスLEDの番号を(最初のマトリクスLEDは0)
rowでその行(一番上が0行目)
bitsで 0~255の範囲で指定したビットのLEDが点灯する。(255で行全部が点灯)
※ここで気を付けなければならないのが、各行の一番右が1ビット目であり、(128, 64, 32, 16, 8, 4, 2, 1)の重みをそれぞれ持っているので足し算していくと任意の点を表示できます。
美咲フォントを参考にドットで文字を打ってみる
美咲フォントをパソコンにインストールして
ワードなどで表示させたい文字を入力!
サイズを大きくして見やすくすれば、ドットを打つのに参考になると思います。
紙などにメモしてアナログ的で地道な作業^^;;
例えば、「ア」だと
void loop(){
 lc0.setRow(0,0,0);
 lc0.setRow(0,1,126);
 lc0.setRow(0,2,2);
 lc0.setRow(0,3,20);
 lc0.setRow(0,4,24);
 lc0.setRow(0,5,16);
 lc0.setRow(0,6,16);
 lc0.setRow(0,7,32);
}
こんな感じになります。
参考になるかわかりませんが、「アイマスー」
と表示させるコードを載せますねw
「アイマスー」と表示させるコード
回路図
//This code below will turn on every dot of the matrix to test that all LEDs work.
#include "LedControl.h"
#include "binary.h"
/*
 ***** These pin numbers are for the Atmega328P
 * with Uno bootloader *****
 * LedControl (name)=LedControl(DataIn,CLK,LOAD,number of Max7219) *
 * pin 12 is connected to the DataIn to first cluster of 8
 * pin 11 is connected to the CLK
 * pin 10 is connected to LOAD == CS
 * number 1-8 up to 8 matricies
 *
 */
LedControl lc0=LedControl(12,11,10,1);
void setup(){
 //we have already set the number of devices when we created the LedControl
 int deviceA=lc0.getDeviceCount();
 //we have to init all devices in a loop
 for(int addressA=0;addressA<deviceA;addressA++)
 {
 /*The MAX72XX is in power-saving mode on startup*/
 lc0.shutdown(addressA,false);
 /* Set the brightness to a medium value (1-15) */
 lc0.setIntensity(addressA,5); //LEDの明るさ
 /* and clear the display */
 lc0.clearDisplay(addressA);
 }
}
/* To determine which LEDs will be on, think of the row as having 8 positions with a specific number attached to each
(128, 64, 32, 16, 8, 4, 2, 1)
If you want every other dot ON in the row starting with the first, add the numbers located in the position you want ON.
(128 + 0 + 32 + 0 + 8 + 0 + 2 + 0) = 170. Use the number 170 in place of 255 below to turn on every other.
All the LEDs on in the row would be (128 + 64 + 32 + 16 + 8 + 4 + 2 + 1) = 255.
*/
void loop(){
  kata_a();
  delay(600);
  kata_i();
  delay(600);
  kata_ma();
  delay(600);
  kata_su();
  delay(600);
  bousen();
  delay(600);
}

void kata_a(){
 //"ア"
 lc0.setRow(0,0,0);
 lc0.setRow(0,1,126);
 lc0.setRow(0,2,2);
 lc0.setRow(0,3,20);
 lc0.setRow(0,4,24);
 lc0.setRow(0,5,16);
 lc0.setRow(0,6,16);
 lc0.setRow(0,7,32);
}

void kata_i(){
 //"イ"
 lc0.setRow(0,0,0);
 lc0.setRow(0,1,2);
 lc0.setRow(0,2,4);
 lc0.setRow(0,3,8);
 lc0.setRow(0,4,24);
 lc0.setRow(0,5,104);
 lc0.setRow(0,6,8);
 lc0.setRow(0,7,8);
}

void kata_ma(){
 //"マ"
 lc0.setRow(0,0,0);
 lc0.setRow(0,1,0);
 lc0.setRow(0,2,254);
 lc0.setRow(0,3,2);
 lc0.setRow(0,4,4);
 lc0.setRow(0,5,40);
 lc0.setRow(0,6,16);
 lc0.setRow(0,7,8);
}

void kata_su(){
 //"ス"
 lc0.setRow(0,0,0);
 lc0.setRow(0,1,0);
 lc0.setRow(0,2,124);
 lc0.setRow(0,3,4);
 lc0.setRow(0,4,8);
 lc0.setRow(0,5,8);
 lc0.setRow(0,6,52);
 lc0.setRow(0,7,194);
}

void bousen(){
 //"ー"
 lc0.setRow(0,0,0);
 lc0.setRow(0,1,0);
 lc0.setRow(0,2,0);
 lc0.setRow(0,3,128);
 lc0.setRow(0,4,126);
 lc0.setRow(0,5,0);
 lc0.setRow(0,6,0);
 lc0.setRow(0,7,0);
}
でわ、bye^^ @hasshie53